
How to install wordpress on localhost / xampp?
Download and Install Xampp
First of all download wordpress latest version form http://wordpress.org.step2- Copy that folder and paste is in xampp>htdocs. where you had intall xampp. you have to just copy and paste this wordpress folder.
step3 – Now reopen the folder named xampp . Double click on the folder xampp-control to start xampp. you will see a popup lik this then click on marked buttons and start xampp.
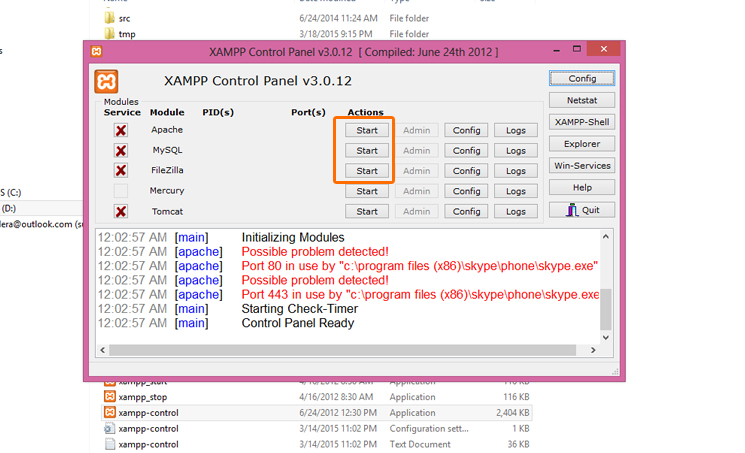
Note: Many time you can face a problem to not start xampp button . In this case you just have to logout your skype for a second before click to start xampp. when your xampp have start then you can login on your skype ID normally.
Step-4 Know Click on browser URL and type http://localhost/xampp/ you will see on your screen like this

It mean your xampp is started successfully .
Step-5 Now you have to Create database . Then what you will do for new database?
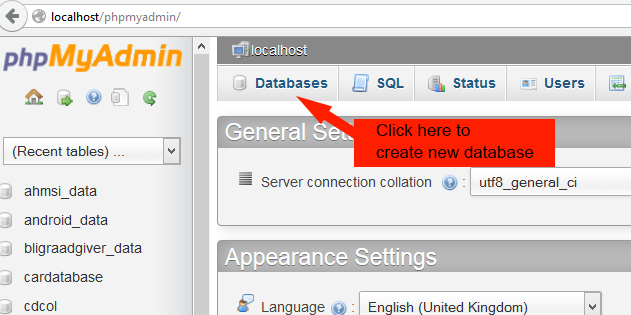
Type on your URL http://www.localhost/phpmyadmin
you will see this type of window on your screen . Now click on database button indicated by arrow to Create New database.
After Click this Database button you will see window like below.
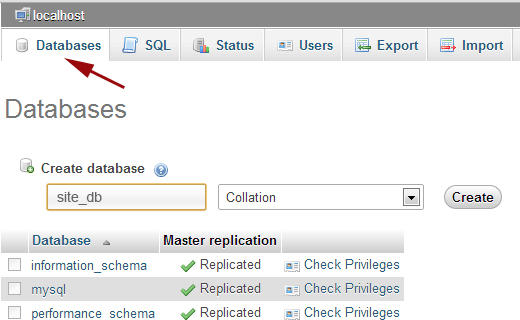
Give database name and click on create button
your database has been created now
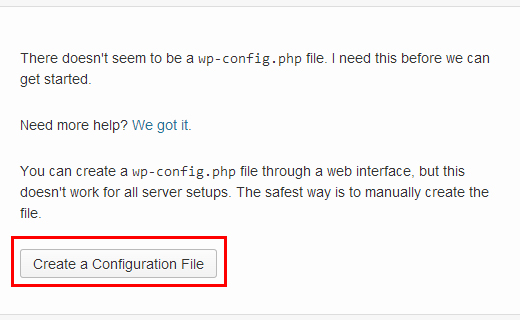
Step-6 Now open URL http://www.localhost/sitename(foldername) [Enter]
and click on Create a configuration file button
Now you need to provide your database information in this window.
Please note that your default database username will be root and the password leave blank. Click on the submit button and WordPress will create a configuration file for you.
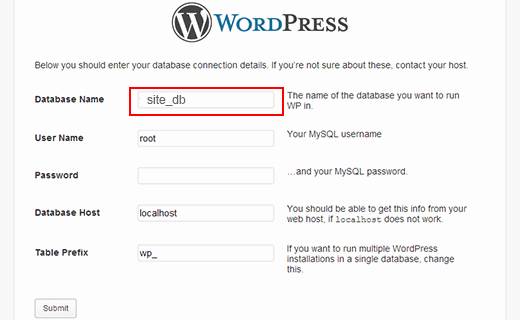
if you have already change your username and password of database in localhost then use only these credentials for configure wordpress.
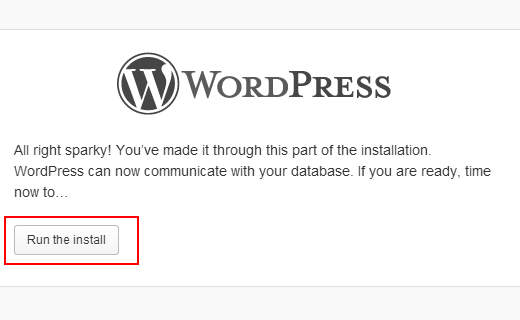
then click on submit button. after this you will see the information that wordpress has been created configration file
successfully. Then click on Run the install button
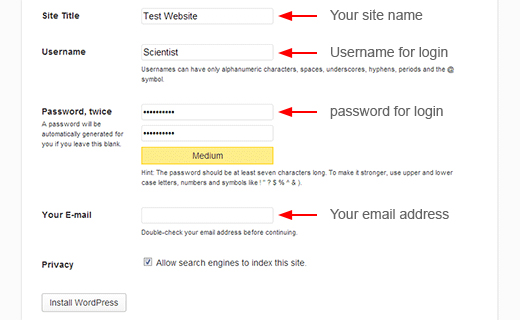
Next screen you just fill the form info.
- Your website name ,
- Username to open admin-dashboard,
- Password for confirm
- Email address
- Install wordpress
At the end your site wordpress admin Panel will be open on your screen
where you can manage your site content according to your needs by create pages and posts
for more information about post and pages please navigate my blog properlly
thanks to read … “Enjoy”


7 comments
Write commentsIts Excellent information for me..I got the best information about create the word press blogs...thank you for giving the best information..Wordpress Web Design Company Bangalore | Wordpress Website Development Company Bangalore
Reply
ReplyDear friend, your article is very informative, you are doing an awesome job, please never give up and keep it up.
How to Install Wordpress on Xampp
It was very clear and descriptive info, thanks for sharing
ReplyWebsite Design Company in Bangalore | Web Development Company in Bangalore
Thank you for this amazing post.ERP software solutions chennai | ERP in chennai | ERP providers chennai
ReplyI like your suggestions they are really helpful. Thank you so much for sharing this post.
ReplyWordPress Support
Hi, Thank you for sharing useful information
ReplyLooking attractive and high quality Magento Ecommerce Portal Development Bangalore services with low cost if you find more details about our Ecommerce portal design and development so please feel free to contact us.
Website Designing and Development in Bangalore
Ecommerce Portal Design and Development
Dynamic Ecommerce Portal Designing
PHP Website Development Bangalore
Wordpress Website Development
Recoolhair Provide 100% Curly Lace Front Wigs, Highlighted Wigs, Frontal Lace Wigs, Glueless Wigs, Short Bob Wigs, Colored Wigs, Pre Bleached Knots Wig, Air Cap Wig, Loose Deep Wave Wigs, Glueless Lace Wig, Hair Bundles with Closure. Free Shipping.
Reply